Showing posts with label panini happy classics. Show all posts

Friday, April 11, 2008

Yup, I Grilled Cookies!

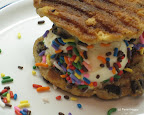
One dollar and fifty cents doesn't buy much anymore these days, but in the Westwood neighborhood of Los Angeles, just off-campus from UCLA, a buck-fitty will get you a most wonderfully decadent classic treat: a scoop of ice cream sandwiched between two freshly-baked cookies at a place called Diddy Riese. The perpetual line out the door is tell-tale. There's either something really good or something really cheap - in this case it's both. It's the original dessert sandwich, and I'm making a panini version to file in my Panini Happy Classics vault. Want to skip ahead? Click here for the final recipe.

Cookies & Ice Cream Panini - Attempt #1

  • Bread: Chocolate chip cookies
  • Meat: None...unless ice cream counts as protein!
  • Cheese: None
  • Condiments: None
  • "Goodies": Rainbow sprinkles

THE INSPIRATION: My sister, Julie, and I had our first opportunity to bake chocolate chip cookies on our own during a summer school cooking class - I was 12 and she was 9. We were supposed to bake 2 dozen cookies at our little kitchen station. Having observed our mother bake countless batches at home (Mom attempted to crack the Mrs. Fields recipe!), we decided to switch things up a little and make 6 ENORMOUS cookies instead. We piled 6 massive mounds of dough onto our cookie sheets and loaded them into the oven, with cheshire grins on our
faces. It'll come as no surprise that we wound up with 6 enormous MESSES, with burnt edges and raw centers. To this day, I still don't understand why the teacher got so mad at us - we may not have yielded any cookies but we learned a lasting lesson about adjusting the oven temperature!

THE PREPARATION: I'll admit I embarked on this one on a whim. I hoped it would be feasible to grill cookies, but I wasn't willing to risk the time it would take to mix up a whole batch of cookie dough from scratch on this chance this descended into a disaster. So I cheated and bought a tub of the store-bought refrigerated dough - a brand called Tom's, which I'd never heard of before, that was re-sealable so I could just make a few at a time.

I heated up the grill to about 325 degrees, as instructed by Tom's, and put four of the cold little discs onto the grates - left a lot of space in between, not knowing if these would spread out like pancakes. I closed the lid, pressing down until the top grates appeared to be making contact with the tops of the cookies. I didn't want to press them too hard, but I did want to get the heat to distribute as evenly as possible.

The package said to bake the cookies for 15-16 minutes, these guys were done after about 8 minutes. When I lifted up the lid, my initial impression of the way the cookies looked wasn't great. I'd hoped to see evenly grilled little rounds, but (I surmised) due to the way that cookies spread from the center out, the centers were taller and therefore only the centers received direct grill contact. However, I did not dispair! I flipped the cookies over and there was the golden, evenly grilled look I was hoping for. This panini world is an unpredictable one at times - a world where bottoms can turn into tops!

THE CONSTRUCTION: I wanted to get the ice cream inside ASAP while the cookies were still warm. I cracked open a brand new container of Dreyer's Slow-Churned vanilla, scooped out a couple of small scoops, and pressed down gently so as not to break the cookies. As a final step, I thought I'd add a little confectionary pizzazz - rainbow sprinkles! All of a sudden, I felt like an 8-year-old kid having just been handed a big cone at Baskin-Robbins, all anxious to dive in. And so I did.

THE RESULTS: Oh yeah! Nothing beats warm cookies and ice cream - the folks at Diddy Riese are geniuses. And it was so quick and easy. I don't feel one iota of guilt over not having made my own cookie dough. The less time I spend prepping these sandwiches, the more time I have to eat them! Oh, and...uh...share them too :-)

Get the final recipe!

> More Panini Happy Classics:

Tuesday, April 8, 2008

Cheeseburger Panini, Animal-Style

If you've spent any length of time in Southern California, you've probably heeded the call of the giant yellow arrow pointing to the sign that makes mouths water: "In-N-Out Burger." Mention the name near lunchtime at the office and before you can say "Not it!" you'll have five or sPanini Happy Classicsix co-workers jammed in your Jetta. Similar to Starbucks, part of the enjoyment of In-N-Out is in the ordering itself - particularly off of the not-so-secret menu. The first "secret" item I ever ordered was the Animal Style burger, featuring grilled onions and an extra amount of special sauce (similar to thousand island dressing). It's drippy and messy and wonderful! Not exactly the delicate characteristics one usually thinks of when it comes to panini...but why not? The Animal Style burger at In-N-Out is one of my favorite sandwiches and so I decided to make a panini version as part of my continuing Panini Happy Classics series. Want to skip ahead? Click here for the final recipe.


Cheeseburger Patty Melt Panini - Attempt #1

  • Bread: Ciabatta rolls
  • Meat: Ground chuck
  • Cheese: Cheddar
  • Condiments: Thousand Island dressing
  • "Goodies": Grilled onions, fresh tomatoes, green leaf lettuce

THE PREPARATION: I decided to start on the onions first - fired up the grill to medium-high heat (375 degrees). I went with white onions since I think their pungency tastes so good on burgers; I sliced one into thin rings (lit a candle to keep from crying!). Brushed a little olive oil on both sides and put 'em on the grill. I debated whether to season them with salt and pepper, but opted not to in an effort to cut down on salt - I'd live to regret this later, stay tuned. Grilled for 3 minutes until I got dark grill marks and the onions were nice and soft.

Next came the meat. I actually just caught an episode of "Good Eats" on the Food Network where Alton Brown lined a jelly roll pan with waxed paper and rolled out ground chuck with a rolling pin and divided the meat into squares. Seemed like that might be a good way to go for a more sandwich-like burger so I gave it a try. My ciabatta rolls were 4"x4", so I made burger squares that were slightly larger to account for shrinkage during the grilling. I gave the burgers a little salt and pepper seasoning and popped them on the grill. I love to hear that great sizzle as soon as the meat makes contact with the grates. I was amazed at how quickly you can grill burgers on the panini grill - a lightning fast 3 minutes to a nice, juicy medium!


While the burgers were grilling, I sliced up some fresh tomatoes and removed the seeds, per Tip #4.


THE CONSTRUCTION:

Once the burgers were done, I immediately (and carefully) scrubbed off the grill and started my sandwich assembly. On the bottom half of my ciabatta roll, I squeezed out about a tablespoon of Thousand Island dressing from the Kraft bottle and spread it around with a knife. Another little tip Alton mentioned on that same episode of "Good Eats" is that mayonnaise acts as a nice "seal" on bread, keeping it from getting soggy. Since Thousand Island is mayonnaise-like, I thought I'd give it a try. Then I added the onions, the burger, two tomato slices and a slice of cheddar cheese. I closed up the sandwich with the top half of the roll and loaded it onto the grill.

I checked after about 3 minutes, but the cheese wasn't melted yet. Another 2 minutes later, all looked good. As a final step, I opened up the bottom of the sandwich and inserted a piece of green leaf lettuce.


THE RESULTS: Not so great. For starters, despite the Thousand Island "seal" I'd attempted to create, the bread still got really soggy from the burger juices (notice how I'm avoiding the "g" word!). The sandwich also wasn't all that flavorful, no doubt due to my stingy seasoning on the onions and the burger. The lettuce didn't do much to add to the taste either and was a little bit of a pain to insert amidst all the other toppings. What was I thinking? For Attempt #2, I was going to have to rethink the soggy phenomenon and up the seasoning factor.

Cheeseburger Patty Melt Panini - Attempt #2

I re-ordered the fillings this time around - instead of applying the Thousand Island dressing directly to the bottom half of the roll, I spread it directly onto the burger itself. In its place, I added a second slice of cheddar cheese so there was now cheese on both the top and bottom of the fillings. This way, I hoped to avoid soggy bread while still keeping the Thousand Island flavor within the sandwich. I added a little more salt to the burger, but not to the grilled onions. No lettuce this time.


THE RESULTS:

Bland, bland, bland! This was getting kind of embarrassing. It's a burger - how basic is that?!! It didn't taste like anything and it was starting to annoy me. I asked my husband what he thought was missing - aside from the burger still being under-seasoned (he didn't eat the onions), and he declared that he really didn't like the ciabatta on this one. I had to agree with him. As much as I love ciabatta - and maybe it was just these particular rolls - it didn't add any flavor and the texture was rather tough and chewy. I had to shut down the panini grill for the night, but I'd procure some new bread at the grocery store the next day and continue the pursuit.


Cheeseburger Patty Melt Panini - Attempt #3

Maybe patty melts are typically grilled on rye bread for a reason. Rye definitely has a distinct flavor. And if flavor is what I was lacking, well maybe I should go back to the tried-and-true. So Attempt #3 was made with rye, with a little olive oil brushed onto the outsides for extra flavor and crispness. I dialed up the seasoning on the meat several notches, adding a liberal amount of salt and pepper to both sides of the patty, as well as a little garlic powder. To try and cut down on the excessive juiciness, I lightly blotted the burger before adding it to the sandwich. Lastly, I grilled up some more onions, this time seasoning both sides with salt and pepper. Oh, this sandwich was gonna taste like something if I had anything to say about it!


THE RESULTS:

At last - YUM! Man, that was probably more difficult than it had to have been. Lesson learned: season your food, plain and simple. Also, if it ain't broke, don't fix it. Patty melts taste great on rye, panini-style or otherwise. The bread was crisp and flavorful, far less chewy than the ciabatta. In the end, this sandwich didn't deviate too far from what we commonly know and love as a patty melt, but you know what - that's fine by me!


Get the final recipe!

> More Panini Happy Classics:

Monday, March 31, 2008

A Little Breakfast Panini Party

Smoked Salmon Bagel Panini

I've decided that panini-making is a lot of fun in a social setting. Everyone gathering around the grill, assembling made-to-order sandwiches (or, in many cases, watching mPanini Happy Classicse assemble their sandwiches to order), anxiously waiting to see those grill marks and melted cheese. I had a little bit of a crowd in the kitchen this past weekend, with my husband Mike, my sister Angela, my sister Julie and her husband Jay in town. They were all game for my latest Panini Happy Classics foray - a new twist on bagels and lox. Want to skip ahead? Click here for the final recipe.


Smoked Salmon Bagel Panini - Attempt #1

  • Bread: Bagel (everything)
  • Meat: Smoked salmon
  • Cheese: Whipped cream cheese
  • Condiments: None
  • "Goodies": Tomatoes, red onions, dill-watercress salad with balsamic vinaigrette

THE INSPIRATION: When I want to make something for Mike that I know he'll really enjoy, I can never go wrong with bagels and smoked salmon. It's his "desert island" meal. And when it comes to this meal, he's pretty much a purist - sesame bagel, not toasted, (a lot of) whipped cream cheese from the tub and a good layer of salmon. Never capers. On occasion he'll ask me to blend up a salmon-cream cheese schmear. So I thought he might appreciate a panini version of his fave. Plus, I'm still on a round panini kick.

THE PREPARATION: I envisioned these bagel panini with nice dark grill marks, and I knew Bagel with top and bottom edges removedthat to achieve them I'd have to have flat surfaces...which do not come naturally with puffy, tubular bagels. So my first task was to create some flat surfaces. First, I split an "everything" bagel - freshly procured from Einstein Bros. that morning - down the middle lengthwise, as I normally do, and then I went to cut off the top and bottom edges. Problem! The bagel was so soft and malleable that it was rather difficult to cut off the edges off the bagel halves without endangering my fingertips. I managed, but I wouldn't advise this method. Note for the final recipe: cut off the edges first and then split the bagel in half.

As I mentioned, my husband foregos any accoutrements when it cSliced red onionsomes to prepping his bagels, but when he orders them in restaurants I've noticed they're often served with rings of red onion and tomato. So I thought I'd include those on this sandwich as well. For the tomatoes, I removed the seeds to minimize the chance of wet bread, per Tip #4.

Next was the dill-watercress salad. I actually was inspired to include a salad after reading this post on the Cookthink blog - what a great way to incorporate greens on a sandwich with a little acidic kick! I pictured something with a small leaf and watercress seemed to fit the bill. The suggestion for adding dill came from my mother-in-law and I concurred - salmon and dill go so well together. So I washed a bunch of watercress and loaded it into a large salad bowl. Judging from the quantity of leaves, I thought 2 tablespoons of chopped fresh dill ought to be enough to disperse throughout the salad.

Then came the dressing - I wanted to do a balsamic vinaigrette. I did a little research and found out that the typical ratio for a vinaigrette is 3 parts olive oil to 1 part vinegar. Looking at my greens in the bowl, I thought I might need about 1/2 cup of dressing. I had to talk this one aloud at length with Angela to get the proportions right: to break 1/2 cup down into a 3:1 ratio translated to 1/4 cup + 2 tablespoons olive oil and 2 tablespoons balsamic vinegar (my head really spun on that one - I was a liberal arts major!). Additionally, I wanted a little garlic in there as well as capers - even though my husband doesn't really like them, they're pretty traditional companions to bagels and lox so in they went. I seasoned the vinegar mixture with salt and pepper and then whisked in my olive oil to finish the vinaigrette. Zesty!

THE CONSTRUCTION: As I often do, I brushed the outer sides of the bagel halves with a little melted butter - not a lot, just enough to ensure a little color and crispness upon grilling. I Bagel sandwich on panini grillspread a generous amount of whipped cream cheese inside both halves of the sandwich. On the bottom half, I added several rings of red onion, then about an ounce of smoked salmon (basically enough to cover the bagel) and a few slices of tomato. I closed up the sandwich and loaded it onto the grill at medium-high heat (375 degrees).

The beauty of this type of sandwich is that since the cream cheese is already in a soft state, all I needed to do was get a nice toast on the bread. Two minutes and thirty seconds was all it took. I removed the sandwich from the grill and prepared it for the final step - inserting the dill-watercress salad. I turned the sandwich upside down, removed the bottom bagel half, piled on some salad and closed it back up.

THE RESULTS: Happy faces (and mouths) all around! I served the smoked salmon bagel panini with a little fruit salad and some OJ. My panini-testing guinea pigsSmoked Salmon Bagel Panini loved how the bagel came out nice and toasty on the outside while still soft on the inside. Julie mentioned that she actually appreciated that I'd cut off the top and bottom edges as it made the sandwich less "bready" than others she's had. Angela commented that the salad "made the sandwich". And even my purist husband appreciated my somewhat embellished version and gave it his stamp of approval. What more could I ask for?

Get the final recipe!

Check out more from the Panini Happy Classics Series:


Tuesday, March 25, 2008

An Ode (or Two!) to California

Well, if I could dare to play around with PB&J, I may as well tackle the other "acronym sandwich" - the BLT! Bacon, lettuce and tomato is a pretty perfect combination as is, for sure. But for my continuing series, Panini Happy Classics, I thought maybe I could make it extra-perfect with a little panini-style variation. Want to skip ahead? Click here for the final recipe.

California BLT Mini-Panini - Attempt #1

  • Bread: Sourdough, cut into circles
  • Meat: Pancetta
  • Cheese: Goat cheese
  • Condiments: Mayonnaise
  • "Goodies": Baby spinach, cilantro

THE INSPIRATION: I don't know why I've become so bacon-obsessed lately. When you look at the "Browse by Topic" section on these two blogs, "bacon panini" stands out with the most recipes. I think it's the result of having been raised on Sizzlean ("Move over, bacon!") and finally having the chance to appreciate the real thing. One thing I've noticed - if a recipe calls for pancetta, rather than bacon, it somehow sounds a little less Denny's (no offense!) and a little more refined. Call it the Giada effect - with proper Italian accent, of course :-) So in contemplating a variation on the good ol' BLT, I looked to pon-CHET-tah for some inspiration. I was kind of admiring its spiraly round shape and I thought of how cool it might look with a nice round slice of bright red tomato. Then I thought, "What if it were on some circular bread?" Instead of serving one large sandwich and cutting it in half, a serving would be two round "mini-panini". Before I knew it, I was dreaming up sandwich ingredients based on their shapes in addition to their flavor.

One additional source of inspiration: my home state of California. If you recall, a while back I set out to create a panini recipe inspired by San Diego. Well, that one didn't quite work out as planned (ended up as a Caribbean tribute!), but I promised to give it another try someday. Well, that day finally came last week when I decided to make a California-style BLT. California BLTs usually include avocado, so that was a given. Going along with the circular theme I thought about nice little rounds of goat cheese as well. And, of course, the San Francisco Bay Area native in me had to put this all on some good sourdough bread.

THE PREPARATION: To get my sourdough into nice little circles, I took one of my tumbler glasses and traced it with a paring knife. The edges came out a little jagged, but the general round shape was there. Since I was making a bunch of sandwiches for testing, I pretty much blew through an entire loaf of sourdough, punching out a hole in each slice! I felt a momentary wave of guilt over the prospect of such wastefulness until my mom, in town visiting from New York, suggested freezing the excess bread (of which there was a lot) to make croutons. Perfect! So that's exactly what I did. Mom is always right :-)

While I was punching out my sourdough circles, I had the panini grill heating up to 375 degrees. I've decided I want to use the grill for prep as much as possible for these panini (as opposed to the stove or oven) - it really is quite a versatile machine. Once it was heated, on went the pancetta. I must say, a grill is great for cooking bacon (those who have been cooking bacon on their Foreman grills can attest) - most of the grease slides on down the ridges and collects in the drip tray. Not only is it easier to clean up, it's got to be somewhat healthier - at least I choose to believe it does.

I'd never actually cooked pancetta on its own before (just diced it up in other recipes) so I was a little surprised to see how much those little spiraly circles shrink up. I guess I should have known, given how American-style bacon shrinks. Oh well, I could still keep them for my round theme - I'd just need two slices instead of one. The more the merrier!


THE CONSTRUCTION: I brushed a little olive oil on what would be the outer sides of my sourdough circles. Then on the inside I spread a thin layer of mayonnaise and topped it with two slices of pancetta, a thin slice of tomato, two slices of avocado, a slice of goat cheese and the top sourdough circle. Grilled for about 4 minutes until the bread was nice and toasty.

Then - here's a new trick - I turned the sandwich upside-down, removed the bottom bread, inserted some baby spinach and cilantro (my "L" in this "BLT") and closed the sandwich back up. I just saw this recommendation for how to keep greens from wilting when you're grillling on a Food Network special recently. Had to update my Panini 101 article with this new tip- there are now 8 Tips for Making Great Panini!

THE RESULTS: Mmmmm! Like I said before, bacon, lettuce and tomato is a pretty perfect combination. I was slightly concerned that using both goat cheese and avocado would make things too mushy, but it wasn't at all. The creamy-tanginess of the goat cheese melded well with the salty pancetta and bright tomato and cilantro flavors. The extra crunch of the olive oil-brushed sourdough also helped to make this a very satisfying sandwich. Mom and Dad (who have rather discerning palates!) really enjoyed it.

Since I had VIP taste testers in the house and I wanted to offer them more than one sandwich variation to try, I went ahead and did an Attempt #2. But I'd call Attempt #1 a success!

California BLT Mini-Panini - Attempt #2

Now, we liked the goat cheese and the pancetta on my first California BLT but I was curious to see if we might prefer going a slightly more traditional route, with swiss and American-style bacon. So for Attempt #2, I swapped out the goat cheese and pancetta and held everything else the same.

THE RESULTS: Great too! The swiss and American-style bacon definitely produced very different flavors. For starters, American-style bacon is smoked while pancetta is not, so there was now a smoky taste in the mix. Swiss cheese melts a bit better and had a larger "footprint" on the sandwich than the goat cheese did so Attempt #2 was a cheesier sandwich.

We really were torn as to which we preferred - both were really good, for different reasons. So for the final recipe I'm offering both variations.


Get the final recipe!


Check out more from the Panini Happy Classics Series:

Friday, March 21, 2008

In Search of M. Croque

Perhaps I've been living in a sandwich bubble - I just ate my first croque-monsieur ten days ago. Well, I guess technically I've had hundreds of them, if you count all the "regular" ham and cheese sandwiches that made their way into my lunchbox growing up. But if you go by Larousse Gastronomique (a resource that's new to me but is evidently the gospel when it comes to French cuisine) what distinguishes a croque-monsieur is that it's grilled. And then there's the béchamel sauce. Lord have mercy. How over the top is that? I mean, literally, a cheese sauce broiled on top of an already sodium-carb-cholesterol-loaded beast? Suffice it to say, that was a new experience for me. Apparently béchamel sauce isn't necessarily a required component and the French eat them with or without it. My sense of health responsibility has to draw the line and say "hold the béchamel"! Want to skip ahead? Click here for the final recipe.


Croque-Monsieur Panini - Attempt #1

  • Bread: Ciabatta
  • Meat: Black Forest ham
  • Cheese: Smoked Gruyère
  • Condiments: Whole grain Dijon mustard
  • "Goodies": Arugula

THE CONSTRUCTION: The fact that croque-monsieurs are traditionally grilled makes creating a panini version (as I have been doing as part of my Panini Happy Classics series) somewhat straightforward. But there were a few other considerations: the type of bread and cheese and, of course, the béchamel. White bread, which is typically used for croque-monsieurs, isn't the best for pressing. It's soft and so it flattens out pretty easily. So I turned to one of my favorite panini breads: good ol' sturdy and flavorful ciabatta. I cut a roll in half lengthwise and turned the halves inside out - that is, I prepared to build the sandwich with the cut sides facing the outside in order to have nice flat surfaces for even grilling (as I recommended in "7 Tips for Making Great Panini"). Normally a croque-monsieur would be presented on buttered bread, but since I was using an olive oil-based ciabatta I drizzled a little olive oil on the cut sides to make them extra crispy and tasty once it came time to grill.

If I were to try to re-create the croque-monsieur I enjoyed a few weeks ago, next up would be a layer of rich, creamy béchamel sauce. I just couldn't bring myself to do it. Instead, I thought I'd punch up the flavor and texture quotient with some whole grain Dijon mustard on both crust sides of the ciabatta.

Arugula was another "non-standard" ingredient I thought would add good peppery flavor as well as a bit of color in the sandwich. That went down on the bottom bread piece.

I'd intended to stick with the traditional Gruyère for cheese, but oddly enough the only Gruyère my local market carried was a smoked variety from Boar's Head. I figured that might provide good additional flavor so I went with it. I lay about a slice and a half on top of the arugula, enough to cover the length of the roll.

Black Forest ham went on next. Now, I can't claim to know a whole lot about the difference between various types of ham but I do know that I prefer this dry, smoky variety to the wet Oscar Mayer type. Not sure how strong the ham flavor was going to be versus the cheese, I decided to go with just one slice. I added another slice and a half of Gruyère, positioned the top half of ciabatta and grilled the sandwich on medium-high heat (375 degrees) for about 5 minutes.

THE RESULTS: Pretty good. It was nice and crisp, flavorful for sure. The mustard was definitely pronounced - not a bad thing, since I like it, but maybe a touch strong for some. I also kind of lost the flavor of the ham amidst the cheese, which wasn't a huge surprise given there was twice as much cheese as ham on the sandwich! The smoky flavor of the cheese itself, by the way, was rather subtle and tasted great. I thought this version was good, but could be improved upon - on to Attempt #2!

Croque-Monsieur Panini - Attempt #2

To tone down the mustard prominence, I spread the whole grain Dijon on just one half of the bread. On the other half, I tried out my new roasted garlic aioli spread I recently picked up at Williams-Sonoma. I thought it would still provide great flavor plus a little of the creaminess that I was missing without the béchamel sauce. I also added a second slice of ham to balance out the ham-to-cheese ratio.

THE RESULTS: Very satisfying! Replacing some of the Dijon with roasted garlic aioli definitely mellowed the flavors - less tangy, more savory, which is what I was going for. And the additional slice of ham made the sandwich feel more "substantial" - like a ham sandwich with cheese, rather than a grilled cheese with a touch of ham. All in all, a tasty panini-fied adaptation of a croque-monsieur. Bon appetit!

Get the final recipe!

Check out more from the Panini Happy Classics Series:

Friday, March 14, 2008

The Taste of Childhood


My sister ate peanut butter and jelly sandwiches virtually every single day from the time she was 5 years old until...well, just this week she told me she made one at her law office! I just read an interesting statistic on the Skippy website that said the average American child will eat 1,500 peanut butter sandwiches by the time he or she graduates from high school. Unbelievable! Growing up, I thought PB&J was okay but it wasn't a fave. I was more of a deli meats girl: bologna, salami and something our local delicatessen (my mom was the only mom who ever said "delicatessen"!) called "turkey roll". I even liked liverwurst in elementary school!

But anyway, back to PB&J. I think it was the texture - or lack thereof - of creamy peanut butter that kind of irked me. PB&J with creamy peanut butter is a mushy sandwich. And if you've read any of my earlier posts, you know that I have a real issue with mushiness. A lot of people love it this way, I'm just not one of them. And it's sticky! Remember that old "Got Milk" ad where the guy calls in for a radio trivia contest and he's got the winning answer, "Aaron Burr!!" but no one can understand him because he's just eaten a peanut butter sandwich without a glass of milk. It's problematic! SO, as I prepared to adapt PB&J into a panini version for the first installment of the Panini Happy Classics series I wanted to focus on utilizing the grill to improve the texture of this childhood classic. Want to skip ahead? Click here for the final recipe.

Peanut Butter & Jelly Panini - Attempt #
  • Bread: Seeded multigrain artisan bread
  • Meat: None
  • Cheese: None
  • Condiments: Chunky peanut butter, strawberry preserves
  • Goodies: Fresh strawberries

THE CONSTRUCTION: I have to preface this by saying I can't believe I'm about to discuss how I went about building a peanut butter and jelly sandwich! Man! Oh well...here goes. So as I mentioned, my goal for this panini-style PB&J was to give it some texture. I started with the bread. Wonder Bread and later whole wheat sandwich bread - once mom caught onto that - was de rigeur for PB&J as I remember it from the '80s. Both are too soft to press on the panini grill, so I turned to a thicker, heartier variety: a seeded multigrain loaf from my local market. Baked fresh hours earlier, it already had a seedy crunch without any grilling so it looked to be a great foundation for my texture-ful sandwich.

Next was the peanut butter itself. That was an easy one: go chunky. It turns out that most people (60%) prefer creamy over chunky, according to Skippy, and that East Coasters prefer creamy while West Coasters prefer chunky. Perhaps that explains my peanut butter disconnect, as a California kid living with New York parents! Anyway, Skippy Reduced-Fat Super Chunk it was.

Which leaves the J. It takes an otherwise mouth-cementing bite to a whole other sweet level. Strawberry has been my favorite as long as I can remember, as much for its bright sweetness as for its bold, bright color. Now, technically you'd have to call my sandwich a PB&P because I used strawberry preserves rather than jelly (I've read about the various distinctions, but it still has me confused). I thought it would be nice to add a layer of fresh strawberry slices for even more - you got it - texture. Plus, we're starting to get some nice strawberries in the grocery store.

To give the bread that nice crisp, toasty crust I like so much, I brushed a little melted butter on the outside of each slice. I flipped them over and began applying my fillings - Super Chunk peanut butter and strawberry slices (so pretty!) on one side and preserves on the other. I closed up the sandwich and grilled it on medium-high (375 degrees) for about 3-4 minutes until it was nicely toasted on the outside and the peanut butter had melted into a semi-gooey wonderfulness.

THE RESULTS: Where have you been all my life? If a PB&J like this had been placed in my lunchbox back in the day, I'd still be eating them all the time today like my sister. There was definitely no mushiness to be found - texture abounded. Crunch came not only from the peanuts but also the crispy grilled buttery bread and the seeds with dotted the crust. The hot, melted peanut butter was incredibly satisfying. And the fresh strawberries helped up the balance of fruit-to-peanut butter such that the sandwich on the whole wasn't too bread-y. A new way to enjoy PB&J and a great excuse to bring out the panini grill!


Get the final recipe!

Check out more from the Panini Happy Classics series:

Thursday, March 13, 2008

A Lesson from "Top Chef"


Are you as jazzed as I am for the new season of "Top Chef"?! I didn't realize how much I missed it until last night's premiere - all the creative culinary stylings, the drama. I mean, they kicked it all off with a quick fire about deep dish Chicago-style pizza - what could draw me in more??

I've also already learned something from the show. In case you missed the first episode, the chefs' first challenge was to prepare classic dishes - eggs benedict, chicken piccata, duck a l'orange and the like. The point, as head judge Tom Colicchio explained, was that you have to get grounded on the classics in order to appreciate the newer dishes that are created today. That idea really stuck with me.

For the past few months I've been brainstorming and kitchen-testing all kinds of panini concepts, but it occurred to me that perhaps I ought to take a step back and revisit classic sandwiches. PB&J, BLT, grilled cheese, reuben, croque-monsieur, monte cristo, cuban - they're tried and true. Of course, I've already tackled one classic, the club sandwich. Over the next few weeks I'm going to do a series: Panini Happy Classics. I'll aim to capture the essential elements of these iconic sandwiches and reinterpret them as panini. Many of them have been done before, but I'm going to enjoy the opportunity to put my spin on them.


Panini Happy Classics:

Monday, March 3, 2008

This Panini is "In Da Club"!


"Bmmmm-bmmmm, bmmmm-bmmmm...Go shorty, it's your birthday..." Even people who don't like rap love this song. 50 Cent's "In Da Club" was the inspiration for my latest recipe - a club sandwich, grilled panini-style. WHYYYY, pray tell?? I'm participating in my first blog event! Elly Says Opa is hosting an event called "Eat to the Beat!" and to participate you need to cook something inspired by a song. For some reason "In Da Club" came to mind - I guess because it's one of those party anthems that gets everyone on the dance floor and I associate it with a fun time. And then I thought, "Club! That's a sandwich!" Yep, it's pretty literal. Now, a club sandwich is pretty much a standard – three slices of bread, toasted on the outside, turkey, bacon, cheese, tomatoes. I wanted to apply some creativity beyond just grilling these ingredients on a panini press, so I thought I'd try to integrate a special ingredient: mangoes. I crossed my fingers and hoped for a fun, festive and tasty outcome! Want to skip ahead? Click here for the final recipe.


Turkey Mango Double-Decker Club Panini - Attempt #1
  • Bread: Sourdough
  • Condiment: Avocado spread
  • Meat: Sliced turkey, bacon
  • Cheese: Swiss, cheddar
  • "Goodies": Tomatoes, Mangoes

THE INSPIRATION: "In Da Club" by 50 Cent, for the Eat to the Beat! blog event.

THE PREPARATION: I thought an avocado spread – basically, a more spreadable guacamole – would not only provide great flavor but add color. To get the smooth consistency I wanted, I pulled my trusty mini-prep food processor out of the appliance wasteland that is my pantry. I pureed a basic guacamole recipe - 1 avocado, a teaspoon of garlic powder, 1/8 teaspoon of sea salt, 1-1/2 teaspoons of fresh lime juice, 2 tablespoons of cilantro – plus added 2 teaspoons of light sour cream for an even creamier texture. A little bland on the first try so I added another 1-1/2 teaspoons of lime juice and that punched things up a bit.

Next, I tackled the "center bread". As you know, a traditional club sandwich is "double-decker", with a bottom piece of bread, fillings, a center piece of bread, more fillings, and a top piece of bread. I wanted to keep this tradition with my panini-style club, but I had some concerns about how the center bread pieces might fare in the pressing. My solution: pre-press them on their own. I lightly pressed them on the panini grill at low heat for about 7 minutes.

THE CONSTRUCTION: I spread about 1-1/2 tablespoons of the avocado spread on the bottom slice of bread, layered on a few slices of quick serve fully-cooked bacon (this is so great to have on hand for making panini!), a few 1/4" slices of mango and a slice of swiss cheese. This comprised the "downstairs" of my sandwich. Next went on the pre-grilled center bread and I built the "upstairs": a thin layer of mayonnaise, turkey breast slices, tomato slices, cheddar and the top bread. This was getting a bit tall! Lastly, I sprayed the top with olive oil cooking spray and grilled on low heat for about 10 minutes. I went "low and slow" to ensure the cheese in the middle of this behemoth had a chance to melt without scorching the bread.

THE RESULTS: Good flavors, texture could use a little help. Despite my pre-grilling, the center bread still got a little mushier than I'd hoped. And then I remembered...I didn't spray any olive oil on it before grilling! An olive oil "barrier" was probably more likely to keep out the extra moisture so I made a note to try that in Attempt #2. Also, I think the juice from the tomatoes may have contributed to the mushiness. This comes straight out of my 7 Tips for Making Great Panini - I should have followed my own advice! One surprising result was the importance of how to arrange the layers to maximize the sandwich's visual appeal. When I cut it in half, the tomato and bacon layers weren't too visible due to how I'd positioned them. The beauty of this sandwich lies in the colorful layers, so that was something else I wanted to rectify. Oh well...on to Attempt #2!

Turkey Mango Double-Decker Club Panini - Attempt #2

I learned my lesson in Attempt #1 and sprayed both sides of my center breads with olive oil this time before grilling. While I was at it, I also sprayed the outside of my bottom bread - it's a little messy to spray the bottoms of these things, but it's worth the extra handwashing to have the nice, crostini-like bread. To make the bacon more visible on the sandwich, I cut each slice in half and made a little carpet of bacon, covering the entire bread. You couldn't miss it now! In place of the mayonnaise, I substituted a second layer of avocado spread - the mayonnaise wasn't adding much flavor and definitely didn't contribute to the colorful presentation. Lastly, I removed the seeds from the tomatoes and made sure they crossed the middle of the sandwich so they would be visible when the sandwich was cut in half.

THE RESULTS: Terrific! The middle bread held up much better this time around with the olive oil. The additional avocado spread added nice flavor and I could now see all the layers when I cut the sandwich in half. The mango is kind of a sweet little surprise in this sandwich - it tastes great with the bacon and is unexpected. All in all, I was proud of this adaptation of the traditional club.

Get the final recipe!

Check out more from the Panini Happy Classics series: